
Making bow and arrow from scratch is more than a skill; it’s an art that has been passed down through centuries. Whether you’re a survival enthusiast, a DIY hobbyist, or simply want to explore the ancient technique of making a bow, this guide is for you. By following these precise steps, you’ll not only make a functional bow but also ensure it has the durability and strength to be used effectively.
In this detailed guide, we’ll cover every aspect of the process, from selecting the right wood to carving the nocks, making arrows, and testing the bow’s efficiency. With a little patience and attention to detail, you’ll have a homemade bow that rivals professionally crafted ones.
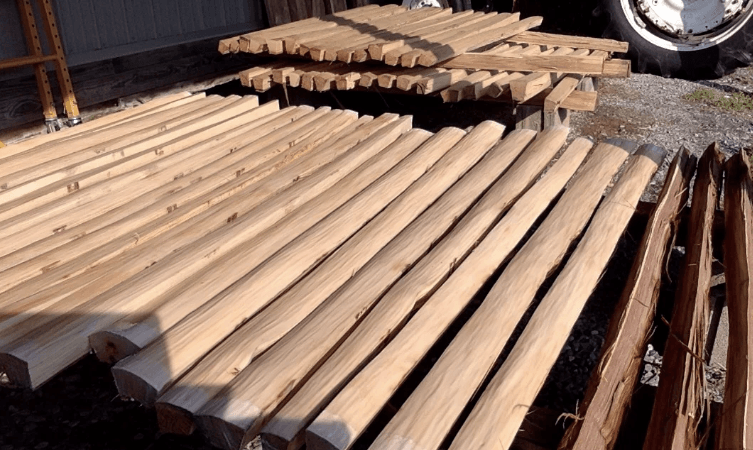
Step 1: Choosing the Right Wood for a Bow

Selecting the right type of wood is essential to the performance and longevity of your bow. Different woods provide different levels of flexibility, strength, and durability. For a traditional wooden bow, some woods stand out for their excellent qualities.
- Hickory: Known for its strength and flexibility, hickory is one of the best choices for beginners. It is widely available and relatively easy to work with.
- Osage Orange: A favorite among experienced bowyers, this wood is tough and durable. It has high tensile strength and can store a lot of energy, which results in more powerful shots.
- Yew: Traditionally used in the famed English longbow, yew offers an excellent balance between tensile strength and compressive resistance.
Pro Tip: Always choose a stave that is at least 6 feet long and free of knots, twists, or cracks. A knot can significantly weaken the bow, and any imperfections could result in a break when the bow is under tension.
Consider: The draw weight of a bow depends largely on the wood used. For instance, a well-crafted Osage Orange bow can achieve a draw weight of 40 to 60 pounds, suitable for both hunting and long-range shooting. In contrast, a simpler hickory bow might have a draw weight of around 25 to 35 pounds—ideal for beginners and target practice.
Step 2: Preparing the Bow Stave
Once you’ve chosen your wood, it’s time to turn the raw stave into a functional bow. The preparation stage involves rough shaping and careful carving. This step will define the characteristics of your bow, such as flexibility and draw weight.
- Mark the center: Find the midpoint of your stave. This will be where your handle is located. Typically, the handle section is about 6 inches long. Mark this section clearly so that you don’t accidentally shave off wood from this area.
- Shape the limbs: The bow’s limbs must taper gradually from the handle to the tips. Start by shaping the limbs with a drawknife or rasp. The belly of the bow (the side facing you when shooting) should be rounded, while the back of the bow (facing away from you) should remain flat. This creates the optimal shape for storing energy when the bow is drawn.
- Tiller the bow: Tillering is the process of ensuring both limbs bend equally when the bow is drawn. Attach a temporary string and gradually draw the bow, watching how the limbs bend. If one limb bends more than the other, carefully shave away more wood from the stiffer limb.
Consider: Aim for a smooth, even curve on both limbs. Uneven limbs result in poor shooting performance and can lead to the bow breaking.
Step 3: Carving the Nocks
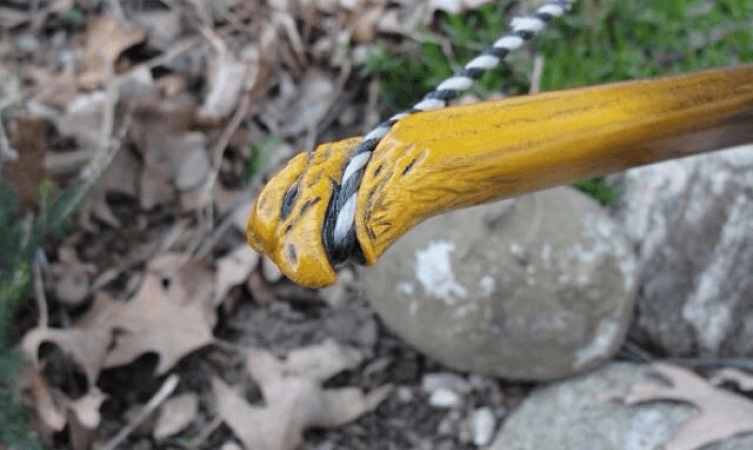
The nocks are notches carved into the tips of the bow that hold the bowstring. These small grooves are essential for securing the string and ensuring it doesn’t slip off during use.
- Measure and mark the nock positions: Place the nocks about 1 inch from the tips of both limbs.
- Carve the nocks: Use a small round file or knife to carve out the nocks. The depth of the nock should be just enough to hold the string securely but not too deep to weaken the tips of the bow.
Consider: Carve the nocks at an angle so that the bowstring sits comfortably without causing too much stress on the wood.
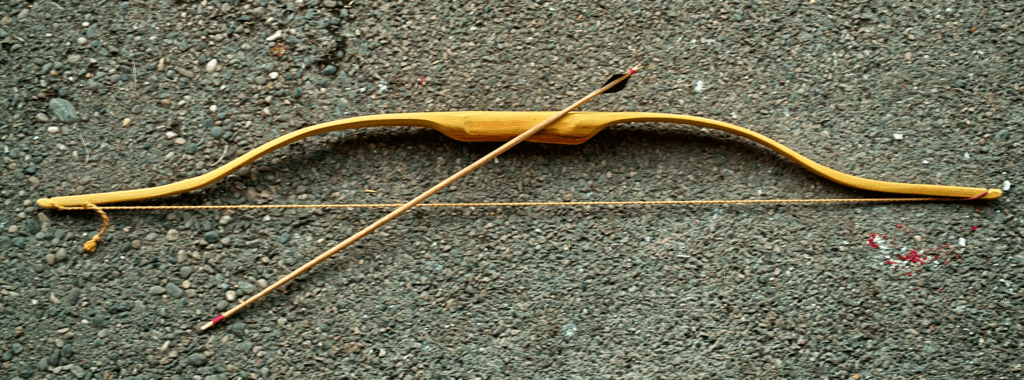
Step 4: Crafting the Bowstring

The bowstring is just as important as the bow itself. It must be strong enough to withstand the tension of the bow without stretching or snapping. Traditional bowstrings were made from natural fibers like sinew or plant fibers, but modern bowyers often use synthetic materials like Dacron B-50, which is more durable and easier to work with.
- Measure the string: Your bowstring should be about 3-4 inches shorter than the total length of your bow. For instance, if your bow is 6 feet (72 inches), your string should be approximately 68-69 inches.
- Serving the string: The middle section of the bowstring, where the arrow will rest, requires extra reinforcement. This area is called the “serving.” Wrap it with fine thread or use a commercial serving tool to protect the string from wear.
- Attach the string: Secure the string to the nocks using a timber hitch or bowyer’s knot. The string should be taut enough to provide good tension when the bow is drawn but not so tight that it deforms the limbs.
Consider: Test the string tension by pulling it back slowly. The string should offer enough resistance but not feel overly stiff.
Step 5: Shaping the Bow and Heat-Treating
Shaping the bow is essential for its flexibility and performance. Heat-treating helps the wood retain its shape and increases its overall durability.
- Heat the limbs: Use a heat gun to evenly heat the limbs of the bow, particularly the belly. This will make the wood more pliable and easier to shape.
- Bend the limbs: Gently bend the limbs as you heat them, applying gradual pressure to achieve the desired curve. For a recurve bow, you may want to curve the tips slightly backward to store more energy in the limbs.
- Cool the bow: Allow the wood to cool in its bent position. This will set the shape and increase the bow’s resistance to breaking under tension.
Consider: Be careful not to overheat the wood. Excessive heat can cause the fibers to break down, weakening the bow.
Step 6: Making the Arrows

A bow without arrows is just a piece of wood. The arrows are just as important as the bow itself. For effective shooting, your arrows must be straight, lightweight, and durable.
- Select arrow shafts: Choose straight, lightweight wood for your arrow shafts. Cedar is a traditional choice, but modern materials like aluminum or carbon fiber can also be used. Each arrow should be around 28-30 inches long, depending on your draw length.
- Fletching the arrows: Fletching refers to the feathers attached to the back of the arrow. These feathers help stabilize the arrow in flight. Traditional arrows used turkey feathers, but synthetic fletching is a modern option. Attach the feathers evenly, about 1 inch from the back end of the arrow.
- Adding arrowheads: For simple arrows, you can sharpen the wooden tips. For more advanced arrows, attach metal or stone arrowheads using glue or sinew.
Pro Tip: Consistency is key. Make sure all your arrows are the same length and weight for accuracy when shooting.
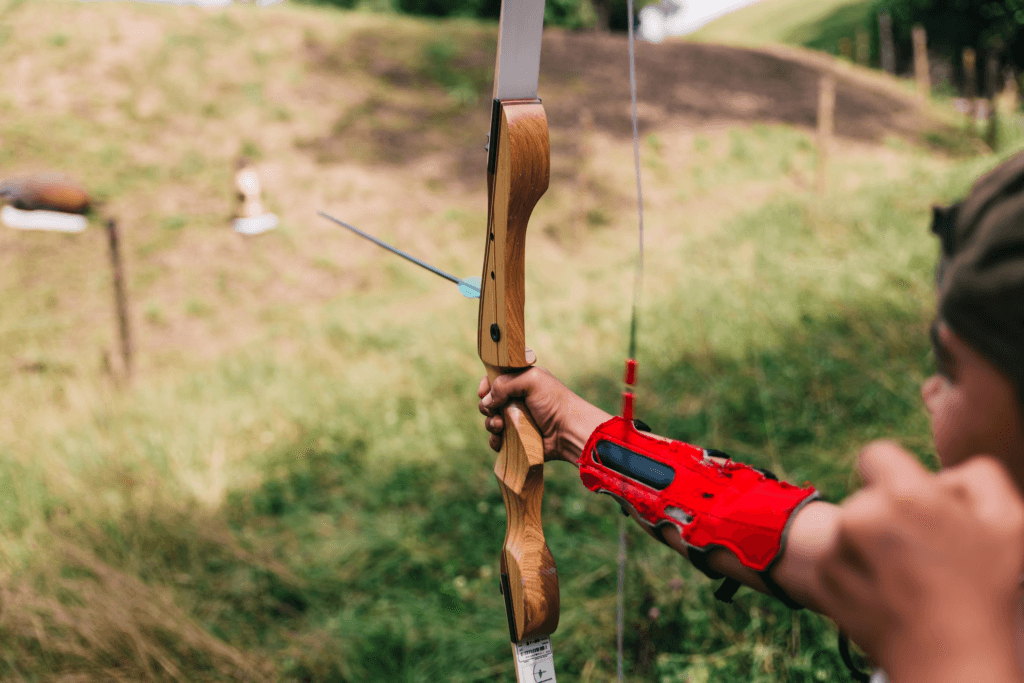
Step 7: Tuning and Testing the Bow
Once your bow and arrows are complete, it’s time to fine-tune them. This process ensures that both the bow and arrows perform optimally.
- Draw weight: Test the bow’s draw weight. A beginner’s bow typically has a draw weight of around 30-40 pounds, which is ideal for target practice. If you plan to use the bow for hunting, aim for a draw weight of 50-60 pounds.
- Testing arrow flight: Shoot a few arrows at a target. Watch how they fly and adjust the nocking point (where the arrow rests on the string) to improve accuracy.
- Final adjustments: Continue adjusting the tillering if necessary to ensure that both limbs bend evenly and that the arrows fly straight.
Step 8: Bow Maintenance and Safety
Maintaining your homemade bow is crucial to its longevity. A well-maintained bow can last for years.
- Protect the wood: Regularly apply beeswax or linseed oil to the bow to protect it from moisture and cracking. Make sure to seal the entire surface, especially after prolonged use in humid or wet conditions.
- Inspect the bow before use: Always check for cracks, splits, or weaknesses before shooting. This is especially important if the bow has been stored for a long period.
- Store the bow properly: Keep the bow in a cool, dry place, and never leave it strung for long periods. The tension from the string can warp the limbs if left in place.
Consider: Use an armguard and finger tabs when shooting to protect your skin from the bowstring’s snap.
How long does it take to make a homemade bow?
Making a simple wooden bow typically takes around 10-15 hours, depending on your experience level and the complexity of the design.
What is the best wood for a homemade bow?
The best woods for making bow at home are hickory, yew, and Osage Orange due to their strength and flexibility. Hickory is great for beginners, while Osage Orange is ideal for more advanced bowyers.
Can I make arrows from any wood?
Yes, but cedar is a popular choice for its straightness and lightweight properties. Modern archers also use aluminum or carbon fiber shafts for better durability.
What is a good draw weight for a beginner?
For beginners, a draw weight of around 30-40 pounds is ideal for target practice. For hunting, a higher draw weight of 50-60 pounds is recommended.
How can I protect my bow from damage?
Regularly apply beeswax or linseed oil to the bow, and always store it in a cool, dry place. Avoid leaving the bow strung when not in use to prevent warping.